Setup

This document will help you setup the hardware and software necessary to participate in the iFlex Workshop.
If you have any trouble following the setup, feel free to call up the B2B support line at +49 7471 96014 – 0.
Hardware
Instead of watching the video guide, you might prefer to follow the written installation guide to wire up the iFlex Devboard.
Connecting Power Supply
First, lay down your iFlex devkit flat on the desk with the power supply to the north, the USB cable to the west and the iFlex Pro stripe to the east.
Next, take the barrel jack plug attached to the power supply cable and insert it into the connector on the top side of the iFlex devkit.
Make sure the power supply is not plugged into mains yet.
Connecting iFlex Pro
Now let’s connect the iFlex stripe with the iFlex devkit. Orient the iFlex stripe with the LEDs facing towards you on the right side of the iFlex devkit.
Take each cable and insert it into the appropriate screw block terminal:
Black to
GNDBlue to
DinRed to
+5V
It might be necessary to first unscrew the set screws, before plugging in the cables. Afterwards make sure each screw is tightened again. Just plugging in a cable without actually fastening the screw might seem to work at first, but will most likely cause intermittent contact failures.
Connecting Mains
With the power supply and the iFlex stripe both being connected, it’s now time to plug in the power supply into mains.
You should be greeted with the iFlex stripe shining in all colours: one white, three red, three green, three blue and one white again.
Connecting USB
As a last step before we turn to the software setup, let’s finish the wiring by plugging in the USB cable to your PC on the one side and to the nano V3 on the iFlex devkit on the other side.
Software
Download the IDE
Download the Arduino IDE 1.x, for Windows amd64 which comes bundled with the iFlex Workshop library.
If you do not use Windows amd64 or already have the Arduino IDE 1.x installed, you can download and install the iFlex Workshop library separately.
Open AreYouReady example
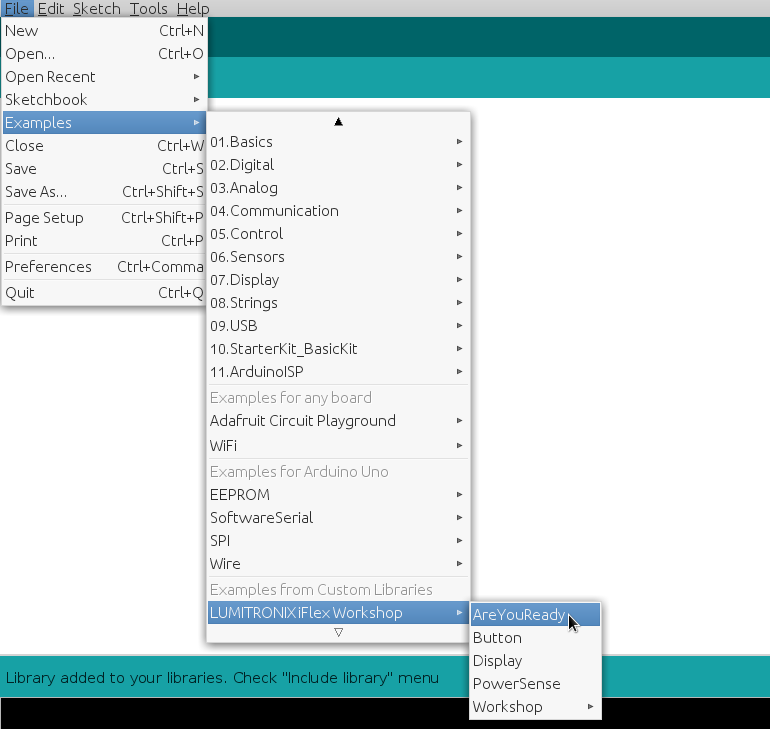
Open the AreYouReady bundled with the LUMITRONIX iFlex Workshop library
by navigating to File → Examples → LUMITRONIX iFlex Workshop → AreYouReady in
your Arduino IDE.
You might need to scroll down in the examples menu, since it tends to be fairly long. If you are not using the bundled IDE download above and do not see the LUMITRONIX iFlex Workshop item, make sure you have the LUMITRONIX iFlex Workshop library installed correctly.
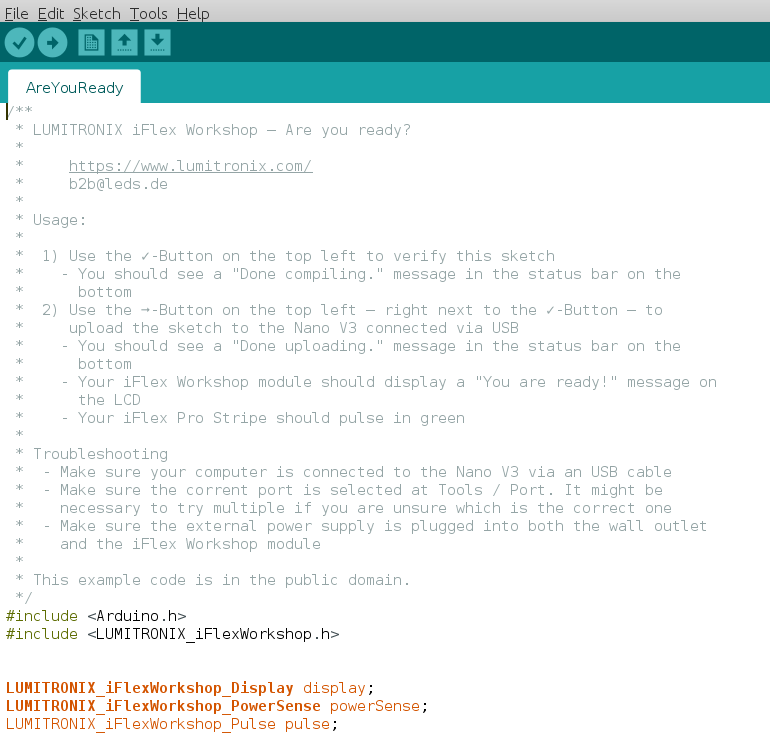
After opening the example, the Arduino IDE should show you a source listing.
Upload the example
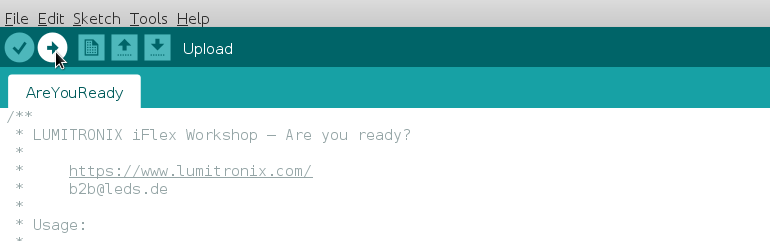
Use the ➞-Button on the top left ‒ right next to the ✓-Button ‒ to upload the sketch to the Nano V3 connected via USB
You should see a Done uploading. message in the status bar on the bottom
Your iFlex Devboard should display a You are ready! message on the LCD
Your iFlex Pro Stripe should pulse in green
Troubleshooting
Make sure your computer is connected to the Nano V3 via an USB cable
Make sure the corrent port is selected at Tools / Port. It might be necessary to try multiple if you are unsure which is the correct one
Make sure the external power supply is plugged into both the wall outlet and the iFlex Devboard